Tuesday, September 7, 2010

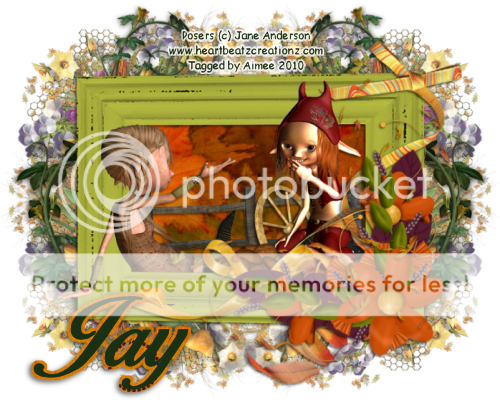
"Fall Friends" PTU Tut


*What you will need*

PaintShopPro (any version should work)
Font I used : Ballantines-Light
Tubes © Jane Anderson

**This tutorial assumes that you have working knowledge of Paint Shop Pro.**

**This tutorial was written by Aimee Pryor on September 7, 2010. Any similarity between
this tutorial and another is nothing but coincidence. You may link back to my tutorials, but do
not copy them and put them on your own group or site of any kind. If you'd like to share your creation, you may email them to me at tnt-aimee@live.com and I will share them here :o) Thanks!**

Ready?!
Open a new 700 x 700 image.  Also open my cluster frame -
Copy and paste as new layer onto your new image.
Using your selection tool set to rectangle, draw out a rectangle
just a little bigger than the inside part of the frame.
Choose a paper from the kit - Resize 70% - Copy and paste
as new layer.  Selections - Invert - Delete.  KEEP SELECTED.

Copy the tube of the girls sitting - No need to resize -
Paste as new layer onto your tag image.  Place where
you'd like - Then duplicate.  Move the duplicate layer
all the way to the top.  Keep the original under the frame - Hit
delete.  Select none.  Add a drop shadow of 2, -2, 60, 5 - Black.
Make the duplicate tube layer active - Using your eraser tool,
erase parts of the girls that show beyond the frame.
Their bottoms, parts of their arms, etc.  Look at my tag
if needed.

Here are a couple elements I threw into the frame with the girls.

Element 19 - Resized 40% - Placed above the (original) girls tube,
below the frame. Drop shadow.

Element 21 (wheel) - Resized 30% - Place below the original girls
tube - right behind the one in red.  Drop shadow.

Element  - Resized 50% - Placed above the background frame layer
and just below the wheel.  Drop shadow.

X Out your bottom layer - Merge visible.
Resize your merged layer only - to 90%
(make sure all layers is unchecked)
Un X the bottom layer and make active.
Open element 7 - Resize 85% - Copy and paste
as new layer.  Place onto the right top corner of the image.
Duplicate - Mirror - Merge down - Duplicate - Mirror - Flip -
Merge down.  Now move this layer below the merged
tag layer.  Lower the opacity to about 80%.

Now open up element 13 - Resize 85% - Copy and paste
as new layer onto the left side of the tag, below the frame
layer.  Duplicate - Mirror.  Drop shadow.

Merge visible.  Crop opaque - resize to your liking.
Add your name and all copyright info.
Save as .png for a transparent background and .jpg
for a white background.

I hope I didn't confuse you too much.
Thanks for stopping by and trying my tut out.


Sunday, September 5, 2010

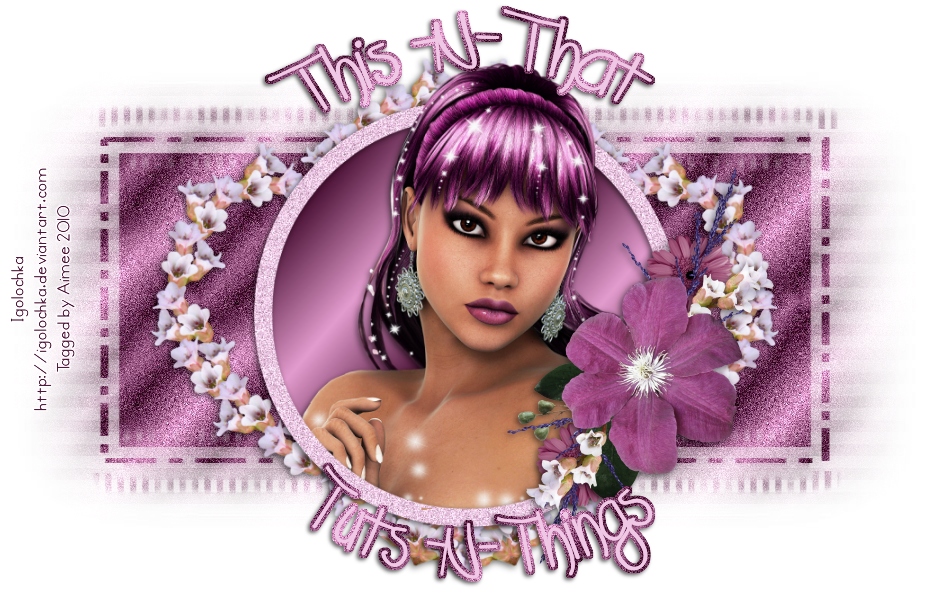
"UpTown Girl" PTU Tut


*What you will need*
PaintShopPro (any version should work)
PTU Kit "UptownGirls" by Crys
Font I used : Satisfaction
Cookie Tubes (C) WishingOnAStarr
Mura Meisters - Copies

My cluster frame *made from the kit*


**This tutorial assumes that you have working knowledge of Paint Shop Pro.**


**This tutorial was written by Aimee Pryor on September 5, 2010. Any similarity between
this tutorial and another is nothing but coincidence. You may link back to my tutorials, but do
not copy them and put them on your own group or site of any kind. If you'd like to share your creation, you may email them to me at tnt-aimee@live.com and I will share them here :o) Thanks!**

READY?!
Open a new 700 x 700 pixel image.
Open my cluster frame - Copy and paste as
new layer.  Using your selection tool - set to circle -
draw out a circle bigger than the inside of the frame..
as shown below:


Choose a paper from the kit - Resize 70% - Copy and paste
as new layer - Selections - Invert - Delete.
KEEP SELECTED!!
Now choose one of those beautiful cookie posers from the kit..
I chose the one sitting.  If using her, then mirror - Copy
and paste as new layer.  Make sure she's below the frame.
I moved her to the left, so that when done right... it looks like
her hand is on the frame, and she's sitting on the bottom of the frame
also. Duplicate and move the top cookie to the very top of
your tag image.  Back to the bottom cookie layer - Hit delete.
Select none.  Let's go back to the top cookie layer - Grab your
eraser tool (settings don't really matter).
Erase just the small part of her hand (leave the thumb alone).
Also erase the other hand, so that it looks like it's still
in the frame.  Erase parts of her body where the deco is from the
frame.  Looks pretty neat eh? :o)
Add a drop shadow to the bottom cookie layer.

Now all that's left is our mask and wordart!
Go to the very bottom layer of your tag image..
it should be raster1 - Select all - Choose a paper
from the kit - Copy and paste INTO selection.
Select none.  Layer - New Mask Layer - From Image
and choose chasmask26 - Apply.  Right click
in layer pallette and merge group.

Resize the mask by 90% - Duplicate - Mirror - Merge down.
You may need to move the mask over to the left, just a bit.
Ok.  Now I liked this... but I wanted to add a little something
more.  So.  Add a new layer - Select all -
Choose another paper from the kit - Copy and paste
INTO selection.  Select none.  Layer - New Mask Layer - From Image
Choose chasmask28 - Apply.  Right click in layer pallette
and merge group. 

Before we finalize the tag... we're going to do something else.
Open a brand new 600 x 600 image.
Open gems3 (the black one) Copy and paste as new layer.
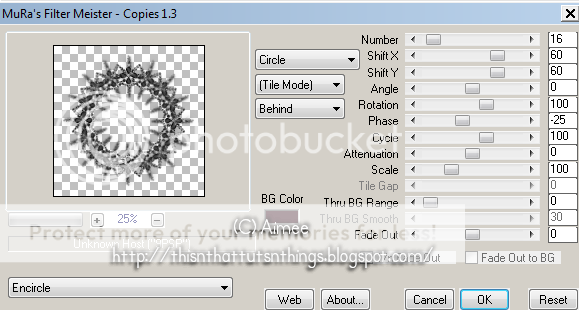
Now effects - Plugins - Mura Meister - Copies
with the settings below:


Apply and copy this new image - Go back to your tag
and above the second mask (right below the frame layer)
Paste as new layer.  Resize 115%.
Ok. Merge visible.  Crop opaque and resize to 500 x 500 pixels.
(or whatever size you'd like)  Open my wordart - Resize
70% or so - Copy and paste as new layer.  I put mine
on top of my tag... but of course, it's your choice.

Merge visible.  Add your name and all copyright info.
Save as .png for a transparent background and .jpg for a white
background.

Thanks for stopping by and giving my tut a try!! :o)

Friday, September 3, 2010

"Heavens Praise" PTU Tut


*What you will need*

PaintShopPro (any version should work)
Font I used : Adorable
Poser tubes included in the kit
WSL_Mask189 by Weescotslass


**This tutorial assumes that you have working knowledge of Paint Shop Pro.**
**This tutorial was written by Aimee Pryor on September 3, 2010. Any similarity between
this tutorial and another is nothing but coincidence. You may link back to my tutorials, but do
not copy them and put them on your own group or site of any kind. If you'd like to share your creation, you may email them to me at tnt-aimee@live.com and I will share them here :o) Thanks!**

Let's start by opening a new 700 x 700 pixel image.
Copy and paste my cluster frame as a new layer.
Grab your selection tool - Set to rectangle - Draw
out a rectangle just a bit bigger than the inside part of the frame.
Choose a paper from the kit - Resized 70% - Copy and paste
as new layer.  Selections - Invert - Delete.  Move the paper layer
below the frame layer and KEEP SELECTED!

Now let's choose one of those LOVELY posers from the kit.
Resize her by 80% - Copy and paste as new layer
(just above paper layer)  Duplicate and hide the duplicate
for now. On the bottom tube layer - hit delete.
It should erase all the parts of her that go beyond the frame.
Select none.

Now let's go to the other copy of the tube....
Move it all the way to the top of the image.
Using your eraser tool, erase the bits of her dress that
show... Most of the bottom of her dress will need
to be erased.  This makes her look like she's coming right out
of the frame.  Add a drop shadow of 2, -2, 60, 6 - Black
to the bottom tube layer.  X out the bottom layer and merge
visible.  Copy and then paste as a new layer... delete
the original.  This step is to place the image into the center
of the tag. :o)

Open swirl from kit - Resize 50% - Copy and paste
as a new layer.  Move the layer below the merged image and
to the upper right of the tag.  Duplicate - Mirror - Merge
down.  Duplicate again - Flip - Merge down. Resize 95%.

Un X the bottom raster layer and make it active.
Select all - Copy a paper from the kit and paste
INTO selection.  Select none.
Now we're going to add our mask.  Layers - New Mask Layer -
From Image - Choose WSL_Mask189.
Apply and then merge group.
Resize the mask 95% and move it down slightly.
Duplicate.  Merge visible.

Open my wordart and resize 70% - Copy and paste
as new layer.  Place wherever you'd like.
Merge visible.  Crop image opaque - Resize to your liking.
Add your name and all copyright info.
Save as .png for a transparent background
and .jpg for a white background.
I hope you enjoyed this tut and it wasn't too confusing to you!!

Thanks :o)

**I also made this cluster frame from the kit...
Which you can download here.
And made another tag, below.  Sooo many beautiful items
in this kit!! :o)

Wednesday, September 1, 2010

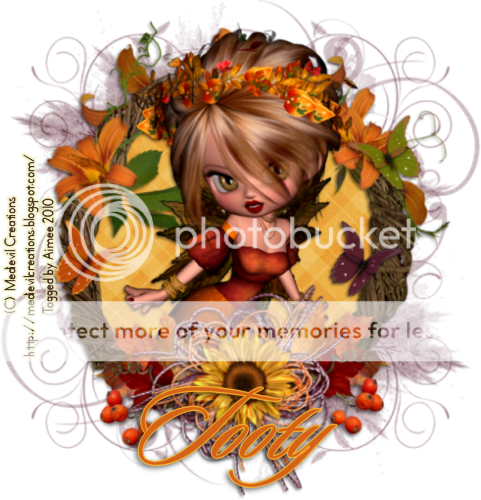
"Fall-Ever Friends" PTU Tut


**What you'll need**

Paint Shop Pro (any version should work)
Poser Tube (C) Medi


**This tutorial assumes that you have working knowledge of Paint Shop Pro.**

**This tutorial was written by Aimee Pryor on September 1, 2010.
Any similarity between this tutorial and another is nothing but coincidence.
You may link back to my tutorials, but do not copy them and put them on your own group
or site of any kind. If you'd like to share your creation, you may email them to me at
tnt-aimee@live.com and I will share them here :o) Thanks!**

Start by opening a new 600 x 600 image.
Also open the cluster frame and mask. Minimize the mask
for later use.

Alrighty. Let's start by resizing the cluster frame by 90%.
Copy and paste as a new layer. Using your freehand selection tool,
draw a rectangle (on the top frame) just a little bigger than the inner
part of the frame. Choose a paper from the kit, Copy and paste as new
layer. Selections - Invert - Delete. KEEP SELECTED.
Move the paper layer under the frame layer.

Now we're going to choose an image to put inside the frame.
I chose to use DBS_Fence_w_Fae02 - Rotated 15% to the right - and
resized 35%. Copy and paste as new layer. Hit delete. Select none.
Make the frame layer active and paste the image again. Align both
together. Now, Using your eraser, erase everything but the fae,
so it looks like she's flying out of the frame. Give the bottom copy
a drop shadow of 2, -2, 60, 8 - Black.

Repeat those same steps for the bottom frame. except change the images
you use. If duplicating my tag... I used DBS_Swing (rotated 15% right) - Resized at 50% and DBS_Staffie01 - Resized at 30%.
Add drop shadow to both of those layers.

Now just to make sure we've got plenty of room to work...we're going to change the canvas size to 900 x 800.

Choose a tube from the kit - Mirror - Copy and Paste as new layer.
I chose to mirror her, to put her on the right side of my tag.
You can, however, do what you'd like....
since you're making your own :o) Apply same drop shadow as
before. (*Note...I added the DBS_LaceParasol to the tube,
to look as though she's holding it*)

Now let's choose a sign from the kit. I chose DBS_Sign02 - Resized 30%
Copy and paste as new layer. Arrange to the left, between the frames,
where the empty space is. Duplicate the sign layer.
Move one copy all the way to the bottom of the tag
 (Add a drop shadow to this layer)
Back on the top copy of the sign - Erase the bottom parts
 that stick out onto the bottom frame.

Almost done!!! Open DBS_Deco01 - Copy and paste as new layer.
Duplicate - Mirror - Merge down. Duplicate - Mirror - Flip -
Merge down. Apply drop shadow we used before.
Move the deco layer to the bottom. Resize 80% and
arrange so that the tag image is in the center of the deco layer.
(I had to move mine to the right slightly).
Add a new layer and move it all the way to the bottom - Select all.
Choose a paper from the kit - Copy and Paste INTO selection.

Now go to Layers - New Mask Layer - From Image - Choose my mask
from the scroll box. Apply and merge group. Resize by 80%.
 For a finalized little something...I chose to add DBS_Pumpkins.
I resized them by 30% and added the same drop
shadow as before. Merge visible - Crop - Resize
to your liking. Add whatever wording you'd like.
 Also add your name and all copyright information.

Save as .png for a transparent background and .jpg for a
white background.  Thanks for giving my tut a try!!!
Hope I didn't confuse you!!


*Here are a couple more tags I made using this kit. There are so many items
within the kit, that it's hard to stop at just one!! I also made the cluster
frame from the kit*


"Friends Are Forever" PTU Tut


*What you will need*

PaintShopPro (any version should work)
Font I used : PhoenixScriptFLF
WSL_Mask360 by Weescotslass

**This tutorial assumes that you have working knowledge of Paint Shop Pro.**

**This tutorial was written by Aimee Pryor on September 1, 2010.  Any similarity between
this tutorial and another is nothing but coincidence. You may link back to my tutorials, but do
not copy them and put them on your own group or site of any kind. If you'd like to share your creation, you may email them to me at tnt-aimee@live.com and I will share them here :o) Thanks!**

Open a new 700 x 700 image.
Using the rectangle selection tool, draw out a rectangle slightly bigger
than the inside of the frame. Choose a paper from the kit, resize at 15% - Copy and paste as new layer. Selections - Invert - Delete. Keep selected!!

We're going to add elements to the image, while still selected.

Sun - 25%
Cloud - 50% - Duplicate
House - 40% - Delete
Bench - 30%
Birdhouse - 30%
Garden - 50% - Duplicate - Merge down. Duplicate.
Bird - 20%

Select none. Apply a drop shadow of 2, -2, 60, 10 - Black
to each of the element layers.

X out bottom raster. Merge visible.

Resize cute girl tube -- 80% - Copy and paste as new layer.
Place her wherever you'd like. Apply drop shadow we used before.
Beaver - Resize 50% - Copy and paste as new layer - Move
to the right side of girl. Add drop shadow. Grab the
Glow worm - Resize 30% - Copy and paste as new layer.
Place him in front of the girl and beaver.
Apply drop shadow. Now let's get the Butterfly resize 20% -
Using deform tool, give it a slight angle. Drop shadow.

Merge visible. Resize just merged image to 500 pixels (Top number)
Orange doodle (doodle4) - 20% - Rotate right 90.
Place onto the right side of image. Move to bottom layer.
Green doodle (doodle5) - 50% - Rotate right 90
Move to right of tag, below orange doodle.
Merge the two doodles together.
Duplicate - Rotate left 90. Merge down. Duplicate - Flip -
Mirror - Merge down.
Drop shadow. Resize 95%. Merge visible. Crop image.

Resize 500 pixels (top number) *All layers checked*
Now let's change the canvas size to 600 x 600.
Un X bottom layer and make it active. Select all - Choose a paper from the kit.
Copy and paste INTO selection. Select none. Layer - New Mask Layer -
From Image - Choose WSL_Mask360. Apply and merge group. Resize
the mask by 85%. Merge visible - Crop and resize to your liking.

Add name and copyright info. Save as .png for a transparent background
or .jpg for a white background.
I hope you enjoyed this tut and it wasn't too confusing to you!!
Thanks :o)


"You've Got A Friend In Me" PTU Tut


**What you'll need**

Paint shop pro (any version should work)
WSL_Mask328 by Weescotslass
Tube (C) Igologchka


**This tutorial assumes that you have working knowledge of Paint Shop Pro.**

**This tutorial was written by Aimee Pryor on September 1, 2010.
Any similarity between this tutorial and another is nothing but coincidence.
You may link back to my tutorials, but do not copy them and put them on your own
group or site of any kind. If you'd like to share your creation, you may email them
to me at tnt-aimee@live.com and I will share them here :o) Thanks!**

Open a new 600 x 600 image in your psp.
From the kit, open the lace frame - Resize by 65%
Copy and paste as new layer. Using your magic wand,
click inside the frame - Selections - Modify - Expand
by 4. Choose a paper from the kit, Resize 65% - Copy
and paste as new layer. Selections - Invert - Delete.
KEEP SELECTED!! Move the paper layer below the frame layer.

Now we're going to add our tube. If using the tube that I've
used, resize her by 85%. Copy and paste as new layer.
Arrange to your liking - Delete. Select none. Now make the lace
frame active and RE-Paste your tube. Line the two tube layers
up together, and using your eraser.... erase her shoulders, some
of her braids, a little of her neck. This gives the effect that
she's coming out of the frame. When you're satisfied, add a
drop shadow of 2, -2, 60, 8 - Black to the bottom tube layer.
Also to the frame layer. X out the bottom and merge the paper,
frame, and tube layers, visible.

Now for the fun part of adding all the elements!!
I'm going to list the elements I used, and how I resized them.
You can choose to make your tag the same way, or different...
either way...it's entirely up to you!!

leaves2 - Resized 50% -- Duplicate - Mirror
flower - Resized 25%
daisy - Resized 25%
grass - Resized 30% - Duplicate and Rotate (copy) left 90 degrees.
bow- Resized 50%

I added the same drop shadow used before to each of the element layers.

Once satisfied with all your elements and their placement.... X
out your bottom layer (Unless you still have it X'd out)
Merge visible. Resize just the image layer to 500 x 500 pixels.
Now let's make that bottom layer active (un X it)
Select all - Choose a paper from the kit - Copy and Past INTO selection.
Select none.

Layers - New Mask Layer - From Image.
Scroll until you see WSL_Mask328. Apply and merge group.
Duplicate the mask layer - Merge down and resize 105%
Effects - Plugins - DSB Flux - Bright Noise.
With the settings below:


Now you can choose my wordart or your own.... If using mine,
resize the wordart by 60% - Copy and paste as new layer.
Apply a drop shadow of 2, -2, 50, 3 - Black.

That's it!!
Resize your image again to your liking, crop any opaque parts.
Add your name and copyright info. Save as .png for a transparent
background or .jpg for a white background.

Hope you enjoyed this tut!!
Thanks!

"Friends Fall-Ever" PTU Tut


**What you'll need**


Paint Shop Pro - Any version should work
Mask of choice
Font: Saginaw
Tube - (C) Bez
DSB_Flux Bright Noise (Optional)


**This tutorial assumes that you have working knowledge of Paint Shop Pro.**


**This tutorial was written by Aimee Pryor on September 1, 2010.
Any similarity between this tutorial and another is nothing but coincidence.
You may link back to my tutorials, but do not copy them and put them on your own
group or site of any kind. If you'd like to share your creation, you may email them
to me at tnt-aimee@live.com and I will share them here :o) Thanks!**


Open a new 600 x 600 image.
Copy rope frame and paste as new layer.
Using your magic wand, click inside the frame.
Selections - modify - expand by 3.
Choose a paper from the kit - Copy and paste
as new layer - Selections - Invert - Delete.
KEEP SELECTED


Move the paper layer below the frame layer.
Open the tube you're using, If using the same one I did,
I resized her by 110% - Copy and paste as new layer.
Duplicate and move the top copy above the frame layer.
Let's go back to the bottom copy of the tube... hit delete.
Select none. Back to the top copy of the tube, take your eraser
tool and erase the bottom parts of the tube. When satisfied,
apply a drop shadow of 2, -2, 50, 10 - Black to the bottom
copy of the tube and to the frame layer.

Here's a list of the leaves I used and how I resized them.


Brown flower - 55%
Brown Leaf - 70%
Orange leaf - 60%
Green leaf - 50%

**Apply a drop shadow to each of the leaves (the same shadow we used before)  Then merge the three together.
Duplicate - Mirror - Flip - Arrange to your liking.**

Here are the rest of the elements I used and how I resized them.


Journal Paper - Rotate right 15 - Move under paper (frame background) layer .
Flowerheart3 - Resize 50% - Place under the merged leaves layer.
Flowerheart1 - Resized 80% - Copy and paste as new layer.
Arrange to the left side of the tag. Duplicate - Flip. Merge down.


**Add a drop shadow to each of the element layers.


Open the alpha from the kit. Make the journal paper layer active -
Copy the F from the alpha - Paste as new layer. Select all - Float - Defloat -
Modify by 2. Choose a paper from the kit and paste as new layer.
Selections - Invert - Delete. Move the colored f below the white one.
Merge down. Apply drop shadow. Duplicate the F and move it down
from the other F. Look at my tag for placement if needed. Merge the
two together. Resize 80%. Apply drop shadow, change the blur to 5.


Now we're going to add text to the F's.
Change your background/fill to color #84461e
By the top F (with Saginaw font - Size 26) Create as Vector
Write out 'riends' - move closer if needed. Convert
to raster layer. Rotate to the right 15 degrees.
Do the same for the bottom F,
except write out 'all-ever'. You may have to move the "all-ever"
words below the rope frame. X out the bottom layer - Merge visible.
Resize 500 x 500 pixels (just the image layer!)


Make the bottom raster layer active and uncheck.
Select all - Choose a paper from the kit - Paste INTO
selection. Select none. Layer -Load/save mask and choose
a mask of your choice. Apply - Merge group. You may have
to move your merged tag image slightly to center with the mask.


This is merely a choice... But I chose to use DSB_Flux Bright Noise
on the mask layer. Intensity set to 40 and "mix" checked. Repeat
one time.


Merge visible. Resize again to your liking.
Add name and all copyright info. Save as .png for a
transparent background and .jpg for a white background.
Done!!!


Thanks for coming by!