Wednesday, September 1, 2010

"Fall-Ever My Friend" PTU Tut


**What you'll need**

Paint Shop Pro - Any version should work
WSL_Mask259 by Weescotslass
Font: Satisfaction
Mouse, dog and Bear tubes included in kit.


**This tutorial assumes that you have working knowledge of Paint Shop Pro.**

**This tutorial was written by Aimee Pryor on September 1, 2010.
Any similarity between this tutorial and another is nothing but coincidence.
You may link back to my tutorials, but do not copy them and put them on your own
group or site of any kind. If you'd like to share your creation, you may email them
to me at tnt-aimee@live.com and I will share them here :o) Thanks!**

Prepare by downloading and opening the wordart and cluster frame.
Also have your scrapkit folder open for easier access.
Install the font, if you don't already have it. There are no filters
in this tut, so you don't have to worry about installing those.

Ready?!

Open a new 600 x 600 image.
Copy my cluster frame and paste as a new layer.
Using the selection tool - Set to circle - Draw out a circle
that's bigger than the inside of the frame.
Choose a paper from the kit, resized at 70% - Copy and paste
as new layer. Selections - Invert - Delete. KEEP SELECTED!
Move the paper layer below the frame layer.

Open the mouse and the brown bear from the kit.
First copy and paste the bear as a new layer. Move
him to the right of the tag (inside the frame)
Then copy and paste as new layer, the mouse.
Place her on the left side (inside the frame)
(You should still have the frame inside selected & inverted)
Merge down... the mouse to the bear. Duplicate and move the copy
above the tag. Go back to the bottom copy - hit delete.
Selections - Select none. Apply a drop shadow of 2, -2, 60, 10 - Black
to the bottom tube layer. Also add the same drop shadow
to the frame.

Back to the top copy of the tube layer - Using your eraser tool,
Erase the bottom parts of the image. The legs, part of the bear's
heart, etc. When satisfied, open the puppy dog tube from the kit,
Resize him by 70% - Copy and paste as new layer. Arrange him
by the bottom of the cluster frame. Look at my tag for placement
ideas, if needed. Apply same drop shadow as before.

X out bottom layer - Merge visible - Resize just the image layer
to 550 x 550 pixels. Open a butterfly from the kit, resize
to your liking - (If using the one I used, resize 80% and mirror).
Apply drop shadow. Now we're going to add doodles. We'll add
them at the top....so we can see what we're doing and then move
the layer down when we're finished. With that being said...Open
the orange doodle first. Copy and paste as new layer.
Place on the right side of the tag - Duplicate -
Mirror - Merge down. Duplicate again - Flip - Merge down. There should
now be 4 of them making a 'square'.

Now let's take that brown doodle. Copy and paste as new layer.
Move to the left side of the tag - Duplicate - Mirror - Merge down.
Now merge this brown doodle layer down to the orange doodle. layer.
Resize just this layer by 95%.

Alrighty!! Almost done!! Un X the bottom layer and make active.
Select all - Choose a paper from the kit - Copy and Paste INTO
selection. Select none. Layers - New Mask Layer - From Image
Choose WSL_Mask259 - Apply. Merge group. Duplicate the mask
layer. Merge down. Now... if it's anything like mine, you'll have to move
your tag image just slightly - to center it with the mask. When
satisfied, merge visible. Copy and paste as new layer, my wordart.
I don't think you'll have to resize it, but do so, if needed.

That's it!! Now resize to your liking - Add your name and all copyright
info. Save as .png for a transparent background and .jpg for a white
background.

Thanks for stopping by!!!


**The cluster frame was also created by using the kit**

"Beary Best Of Friends" PTU Tut


**What you will need**


Paint Shop Pro (Any version should work)
PTU Kit "FallEverFriends_Tagger" by Wicked Princess
Bear tube included in kit
Font : Sloop
My Mask10
My cluster frame


My wordart


**This tutorial assumes that you have working knowledge of Paint Shop Pro.**


**This tutorial was written by Aimee Pryor on September 1, 2010 . Any similarity
between this tutorial and another is nothing but coincidence.
You may link back to my tutorials, but do not copy them and put them on
your own group or site of any kind. If you'd like to share your creation,
you may email them to me at tnt-aimee@live.com and I will share them here :o)
Thanks!**

First download your font, my cluster frame, and wordart.
Open both the wordart and cluster in your PSP... minimize wordart
for the moment.


Ready?!
Open a new 600 x 600 image in your PSP.
Resize my cluster frame by 85% - Then copy and paste
as new layer. Using your selection tool - set to circle -
draw out a circle just a shade bigger than the inner frame.
Choose a paper from the kit, resize 85% - Copy and paste as
new layer. Selections - Invert - Delete. KEEP SELECTED!!
Move this paper layer below the frame layer.


Now let's grab the bear from the kit, isn't he cute?! :o)
No need to resize him, he's perfect!! Copy and paste as
new layer. Move to the right edge of the frame image and
hit delete. Select none. Make the frame layer active and
re-paste the bear. Align him evenly with the bottom bear layer.
Using your eraser, erase his foot area. Now it looks like he's coming
out at us :o) (And he's got a flower for Tooty!!) Add a drop shadow
to the bottom bear tube layer of 2, -2, 60, 10 - Black.
(Repeat this shadow for the frame layer also)


Now I only used a couple extra elements aside from what's
in the cluster frame. So I'll just list what they were.
Butterfly - Resized 20 % - Drop shadow added.
Bow - Resized 30% - Drop shadow added.


X out bottom layer - Merge visible. Resize just this layer 85%.
Resize wordart by 85% - Copy and paste as new layer. Arrange
to your liking. Merge visible. Resize just image layer to 500 X 500 pixels.
Un X the bottom layer - Select all - Choose a paper from the kit
Copy and paste INTO selection. Select none.
Layers - New Mask Layer - From Image - Scroll until you come across
my mask10. Apply. Merge group. Resize mask layer by 90%.
Merge visible - Resize again if you'd like to.


Add your name and all copyright info. Then save as .png for a transparent
background and .jpg for a white background.


Hope you enjoyed this tut!!
Thanks for trying it out!!


**The cluster frame was also made from this kit**


"Friends Are Friends Fall-Ever" - PTU Tut

*What you will need*
PaintShopPro (any version should work)
Font I used : AKA Dora
Vix_Mask238 by Vix
(Optional - DSB_Flux)


**This tutorial assumes that you have working knowledge of Paint Shop Pro.**

**This tutorial was written by Aimee Pryor on September 1, 2010. Any similarity between
this tutorial and another is nothing but coincidence. You may link back to my tutorials, but do
not copy them and put them on your own group or site of any kind. If you'd like to share your creation, you may email them to me at tnt-aimee@live.com and I will share them here :o) Thanks!**

Ready?!
Open the wordart, cluster frame and mask in your PSP.
Minimize both the mask and wordart for now.
Open a new 700 x 700 image - Copy and paste my cluster
frame as a new layer. Using selection tool - set to Ellipse -
Draw out an oval bigger than the inside of the frame.
Choose a paper from the kit - Copy and paste as new layer.
Selections - Invert Delete. KEEP SELECTED.
Move the paper layer below the frame.

Open Dog - Resize 50% - Mirror - Resize again by 80%
Open one of the poser tuebs - Resize 90% - Copy and paste as
new layer - Move below the dog layer - Duplicate the tube image
and move the top copy above the cluster frame layer.  Go back to
the bottom copy of the tube and hit - Delete.
Select none. Using your eraser tool,
erase the poser's legs that show beyond the frame.
You'll have to erase her right arm (your left), part of her
dress up to the dog. Leave her
other hand. It looks fine the way it is. Ok. Once satisfied...
Apply a drop shadow of 2, -2, 60, 10 - Black to the bottom tube layer.

X out bottom raster layer - Merge visible.
Butterfly (orange and yellow) - 15% - Drop shadow
Butterfly (purple) - 15% - Drop shadow
Merge visible.
Resize the image - 85%

Alrighty... now leave this image alone for just a minute
and open a new 600 x 600 image. Open bead_doodle and
bead_doodle1 - Copy and paste each as new layer. Mirror
and flip the purple one - align with the green one so that the
starting circles line up - Look below:


Merge down - resize 60%. Copy the image and paste as new layer
(still on the new image - this will center the doodle.s)
Effects - Plugins - Mura Meister - Copies
Use the settings below:


Apply. Now copy the pretty little deco we made
and paste it as a new layer on your tag image.
Nice, eh? :o) Move this layer to the bottom,
just above your X'd out layer.
Now Un X the bottom layer - Make active.
Select all - Choose a paper from the kit - Copy and paste
INTO selection. Select none.

Layers - New Mask Layer - From Image - Choose Vix_Mask238.
Apply. Merge group. Duplicate - Merge down. Resize just the mask
layer by 95% and move slightly if desired. I chose to add DSB_Flux
Bright Noise to my mask layer... you don't have to, but if you'd like
to... I put the intensity to 30 and checked "mix".

Alrighty- Merge visible. Resize my wordart by 90% - Copy and
paste as new layer. It's your choice where you'd like to put it.
I chose to put mine at the bottom. Merge visible - Resize just this
layer by 90%.   Now add your name and resize to your liking.
Also don't forget to add your copyright information.

That's it!! Now save your image as .png for a transparent
background or .jpg for a white background.

Thanks for stopping by to tut with me!!


**The cluster frame used in this tut was also created
by using this kit**

Tuesday, August 31, 2010

"Merry Christmas" PTU Tut

*What you will need*

PaintShopPro (any version should work)
Font I used : AKA Dora
WSL_Mask167 by Weescotslass


**This tutorial assumes that you have working knowledge of Paint Shop Pro.**

**This tutorial was written by Aimee Pryor on August 31, 2010. Any similarity between
this tutorial and another is nothing but coincidence. You may link back to my tutorials, but do
not copy them and put them on your own group or site of any kind. If you'd like to share your creation, you may email them to me at tnt-aimee@live.com and I will share them here :o) Thanks!**


Ready?!
Let's start by opening a new 700 x 700 pixel image.
(I know it's large, we'll resize later)
Open one of the oval cluster frames from my download -
Copy and paste as new layer.  No need to resize, since
our canvas is so big.

Ok... I know the outer edge of the frame is tiny... hard
to get it all selected.  So.  Here's a way to do just that.
Make the bottom (empty) layer active - Go to your preshapes
tool.  Click on the little drop down arrow - Choose Ellipse.
Draw out your ellipse to match up with the frame.  It's easier
with the vector shapes, because you can always move the nodes
around to match up.  Look at my image below if I've confused you.


Once satisfied with your ellipse - Convert to raster layer.
Now - Select all - Float - Defloat - Choose a paper from the kit,
Resize 80% - Copy and paste as new layer.  Selections - Invert - Delete.
KEEP SELECTED and delete the bottom layer (the vector shape we
created).  Make sure your paper layer is active - Choose an image
for the background -  I chose the following elements for mine:

Tree - 80% - Hit delete to rid of excess outside of frame.
Star - 35% - Placed at top of tree - hit delete
Ornaments - 15% (as many or as little as you'd like)
I selected one of the gold diamonds from the splatter - copied
and pasted it in various spots on the tree... merely a choice.
Select none.  Add a drop shadow (to each of the layers)
of 0, 0, 80, 6 - Black.  X out the bottom layer and merge visible.

Open the tube from the kit, resize 75% - Mirror - Copy and paste
as new layer - Move her to the left side of the tag.
Add a drop shadow of 2, -2, 60, 10 - black.
Make the background layer active - Create a new vector - Ellipse -
Draw out an ellipse just a shade bigger than the frame image.
Once satisified, Using a script font of your choice -
write out "Merry".  X out the ellipse layer - Right click on vector
and create as raster layer.  Do the same for "Christmas".
Merge the two words together after placing them to your liking.
Effects - DSB Flux - bright noise - Intensity at 30 and mix checked.
Repeat one time.  Select all - Float - Defloat - Modify by 2 - Add
a new layer and fill with a dark green from the leaves on the cluster
frame.  Select none.  Move the dark green letters below the golden
ones.  Merge down - Drop shadow.  Make sure your "Merry Christmas"
layer is above the frame layer.  Merge visible.

Resize entire image to 500 x 500 Pixels (all layers checked)
Now resize the canvas to 600 x 600 pixels.
Copy your merged image and paste as new layer.
This will make sure the image is centered.
Ok..now for the background and masking!

Make the bottom layer active - If it's still X'd out,
un X it - select all - Choose a paper from the kit - Copy
and paste INTO selection.  Select none.
Layers - New Mask Layer - From Image - Choose
WSL_Mask167.  Apply and merge group.
Move the mask slightly down and to the right.
Apply the same DSB flux as before (repeat one time)
Open DBS_  - Resize 60% - Copy and paste as new
layer.  Move to the bottom left side of the tag (above
mask layer) Duplicate - Mirror - Flip.  Merge down.
Apply Drop shadow. Merge visible.  Crop opaque.

Resize to your liking - Add your name and all copyright
info.  Save as .png for a transparent background and .jpg for a white
background.

Thanks for stopping by to partake in my tut! :o)


**I made these cluster frames using the kit.**


**I also made Stina this "showoff" tag... showing more of the elements
within the kit**


Sunday, August 29, 2010

"Enchanted" PTU Tut

**What you'll need**

Jasc Paint Shop Pro  (any version should work)
PTU Kit "Enchanted" by Crys
DiamondsbyTonyaMask1 - CreativeMisfitsCreations

**This tutorial assumes that you have working knowledge of Paint Shop Pro.**
**This tutorial was written by Aimee Pryor on August 29, 2010. Any similarity between this tutorial and another is nothing but coincidence. You may link back to my tutorials, but do not copy them and put them on your own group or site of any kind. If you'd like to share your creation, you may email them to me at tnt-aimee@live.com and I will share them here :o) Thanks!**

Let's start! Shall we?
First make sure you've got your filter and font installed.
Open the mask in your PSP and minimize for now.

Ok. Here we go!  Start by opening a new 700 x 700 pixel image.
I know it's large, but we'll need the space to work with.
Open the frames folder in the kit, choose one of the rectangle frames.
Rotate the frame Right - Clockwise - Copy and paste as new layer
onto your image.  Using your magic wand (feather and tolerance set to 0)
click inside the frame.  Selections - Modify - Expand by 3.
Choose a paper from the kit - Resize 70% - Copy
and paste as new layer - Selections - Invert - Delete.  KEEP SELECTED!!

Now we're going to add a whole bunch of goodies to the inside
of the frame.  Keep selected until I tell ya' we're done.
(not trying to sound too demanding...lol)
I'll list for you, the items I used and what I did.
Please note... Instead of repeating constantly.... when you place
the elements, if they go beyond the frame, remember to hit
delete before moving onto the next element.

Shoe House - Resized 70% - Moved to top center
Tree - Resized 50% - Moved to right of tag
Sun - Resized 50% - Moved to left of tag
Blue Mushroom - Resized 30%
Purple Mushroom - Resized 30%
Pink Mushroom - Resized 35%
Hill - No resize needed
Grass - Resized 20% - Duplicated 3 times and arranged
Birdhouse - Resized 50%
Bird - Resized 15% (Placed on pot at bottom of birdhouse)
Fence - Resized 50% - Duplicate and Arrange

Make sure to arrange all those elements to your liking.
Once satisfied, select none.  Apply a drop shadow of 2, -2, 50, 8 - Black
to each of those element layers.  Also give the frame the same
drop shadow. 

X out the bottom raster layer - Merge visible.  Now we won't get too confused
with the layers. :o)  I used a couple more elements above
the frame, which I'll list for you now.

Flowers - 35%
Dragonfly - 20%
Lizard - (He's so cute!!) 40%

Drop shadow each of those layers.
Now choose one of the cookie posers from the kit.
Resize her at 60% - Copy and paste as new layer.
I put mine to the left of the lizard and just below.
(Move the tube layer below the lizard layer).
Give her the same drop shadow we've been using.
Merge visible. (Your bottom raster should still be X'd out)

Alrighty.  Now let's dress up the backside of the tag!! :o)
Grab the color splatter from the kit, no need to resize -
Copy and paste as new layer - Arrange to the bottom right of
the tag, Duplicate - Mirror - Flip - Merge down.
Move this layer just above the X'd out raster.

Now let's take the green bead spill - No need to resize -
Copy and paste as new layer.  Move to the bottom right of the
tag - Duplicate - Mirror - Flip - Merge down.
Lower the opacity to about 70%.

Effects - Plugins - DSB Flux - Bright Noise
Intensity set to 30 - Mix checked.
Apply and repeat once.
One more element to add!!  Open the swirl from
the kit - Resize 20% - Copy and paste as new layer.
Move it to the bottom left of the tag, on the frame
corner.  Duplicate - Mirror - Flip - Merge down and apply
drop shadow.  Phew!!

Make sure the bottom layer is still X'd out.  Merge visible.
Resize image to 500 x 500 pixels. *All layers unchecked*

Now let's do the mask!!
UN X the bottom layer and make it active - Select all -
Choose a paper from the kit - Copy and Past INTO selection.
Select none.  Layer - New Mask Layer - From Image -
Scroll until you see "DiamondsbyTonyaMask1"
Apply.  Merge group. Duplicate - Merge visible.
Crop and resize if needed.
Now add your name and all copyright info.
Save your tag as .png for a transparent background
or .jpg for a white one.

Thanks for tutting with me! Hope I didn't confuse you!!


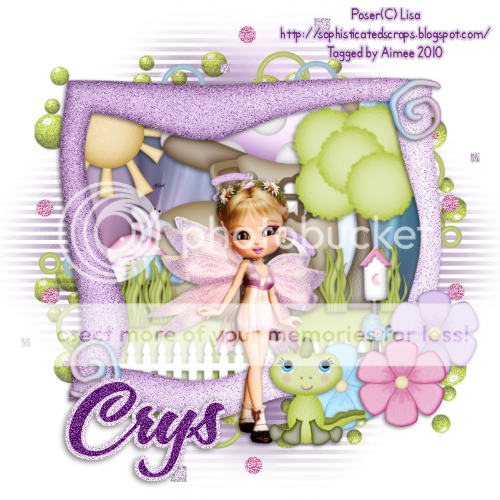
**I also made this cluster frame with the kit.
The frame is a freebie... personal use ONLY!!  And you can
download it HERE.**

Friday, August 27, 2010

Let Me Be Your Fantasy - FTU Tut

**What you will need**

Paint Shop Pro (any version should work)
FTU Kit "FantasyLand" By Muriel @ Creative Disorder
Font: Satisfaction
Tube (C) Medi
DSB Flux - Bright Noise


Alrighty!  Let's start by opening supplies and putting them
into PSP so they're there when we need them!
Download and open my cluster frame and wordart, minimize the
wordart for the moment.  Also be sure to install DSB Flux, if you
don't already have it.  Also install the font.

Ready? Here goes nothing!
Open a new 600 X 600 image.  Copy cluster frame
and paste as a new layer.  Using your selection tool, set to
circle, draw out a circle just a little bigger than the center
opening.  Choose a paper from the kit and resize 50%-
Copy and paste as new layer, selections - invert - delete -
 moving the paper layer below
the frame.  Keep selected!!
Open the unicorn images from the kit, Resize each
one at 50% - Copy each and paste as new layer.
Arrange to your liking, or look at my tag for placement.
Hit delete just to be sure there's no part of the unicorns going
beyond the frame.  Apply a drop shadow of 2, -2, 60, 8 - Black
to each of the unicorns also to the frame layer.

X out the bottom layer and merge visible.  Resize just
the merged layer to 500 X 500 pixels.  Choose a tube from
the kit, resize 80% - Copy and paste as new layer.
You can place it wherever you'd like, however, I put mine on the
left side of the tag.  Apply the same drop shadow as before.

Open FL_CD_FairyDust1 - Resize 30% - Copy
and paste as new layer - Arrange above the flowers on the
cluster frame.  Make the bottom layer ( the X'd layer ) active
Now let's go to the kit and grab Fl_cd_Floralbush.  Resize
by 70% - Copy and paste as new layer.  It should be right below the
main tag image.  Move it towards the top, Duplicate - Mirror - Flip.
Now let's move the two of these bushes together (make
sure there's no space between the two of them.  Merge down.
Adjust blur - Gaussian - 10.

Now, just to be sure on room... let's change the canvas size
to 700 X 700 pixels.  Alrighty... Now let's go to Effects -
Texture Effects - Mosaic Antique - with the settings below:


Now Effects - Plugins - DSB Flux -  Set the Intensity to 25
and make sure "mix" is checked.  Apply and repeat
one more time.  Lower the opacity of this layer to about 80%.
Resize to your liking.  Add your name and all copyright info.

If using my wordart, resize 55% then copy and paste.
You're done!!

Thanks for giving my tut a try, hope you succeeded and made
an awesome tag!!!

Wednesday, August 25, 2010

"Let There Be Peace" PTU Tut

**What you will need**

Paint Shop Pro (Any version should work)
Font : Selfish
Doll tube (C) Albina Design


Ready to get started?
First...Install your filter before opening your PSP.
Now let's open a new 600 x 600 pixel image.
Let's also open the cluster frame and wordart.  Minimize
the wordart for later use.

Resize the cluster frame by 85% - Copy and paste as new layer
onto open image.  Using your freehand selection tool - Draw out
a square just a tad bigger than the inside of the top frame.
Choose a paper - resize 50% - Copy and paste as new layer -
Arrange to your liking - Selections - Invert - Delete.  KEEP SELECTED!!
Move this paper layer below the frame layer.

Now I chose to use the little well image to place inside this
frame, merely a choice.  If using the well - Resize 35% - Copy and
paste as new layer.  Arrange to your liking - Delete.  Select none.
Apply a drop shadow of 2, -2, 60, 4 - Black.
 Repeat those steps for the bottom frame, using a different picture
than before.  If using the pathway with the cat, like I did... Resize
30%.  X out the bottom layer and merge the paper, image, and frame
layers together.

Now we're going to add our Doll :o)
Resize her by about 45%. Copy and paste as new layer and
arrange to your liking.  Look at my tag for placement ideas if needed.
Apply same drop shadow as before.
Now let's open the tp-magical bling7 - Resize 45%.  Using your eraser
tool, erase the large heart and other areas on the right side. (leave the
small heart, flowers, and glow on the left)
Copy and paste as new layer - Arrange to the opening on the top
right of the frame. (the empty space)  Move below the merged frame
image.  Duplicate - Mirror - Flip.  Merge down.
Apply drop shadow.

Now let's open the tp-magical bling1
Resize 45% - Copy and paste as new layer.  Arrange to the same space
we put the last deco.  Duplicate - Mirror - Flip.  Merge down.
X out the bottom layer again (unless you've still got it x'd out)
And merge visible.  Resize this layer to 500 X 500 pixels.
(All layers unchecked)

Duplicate your merged image.
On the bottom layer - Adjust - Blur - Gaussian 10.
On the top layer - Resize 95%.
Make the bottom image layer active again
Effects - Plugins- DSB Flux - BLAST
with the settings below:


Repeat changing the direction to right, then upwards, and then downwards.
Resize my wordart by 70% - Copy and paste as new layer.
Place wherever you'd like.  Apply a drop shadow
of 2, -2, 40, 3 - Black.  Merge visible and resize to your liking.
Add your name and all copyright info.
Save as .png for a transparent background or .jpg for a white background.

I hope you enjoyed this tut and that I didn't lose you in the process!!
Thanks!!

*Here's another tag I made using the same kit. 
(The cluster frame was also made from this kit) See the possibilites?!*